Langtang Trek – day 6

Trip report by site editor Rick McCharles

Langshisha Kharka 4110m to Kyanjin Gompa 3830m

… day hike towards Tilman’s Pass basecamp

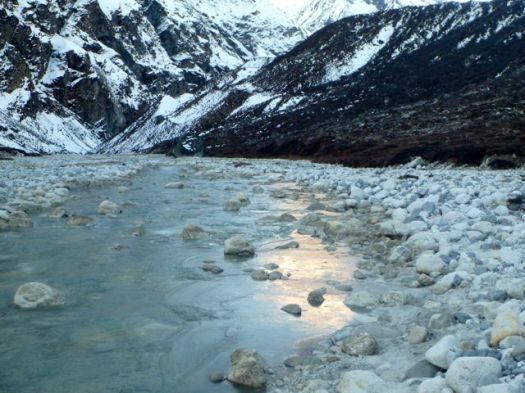
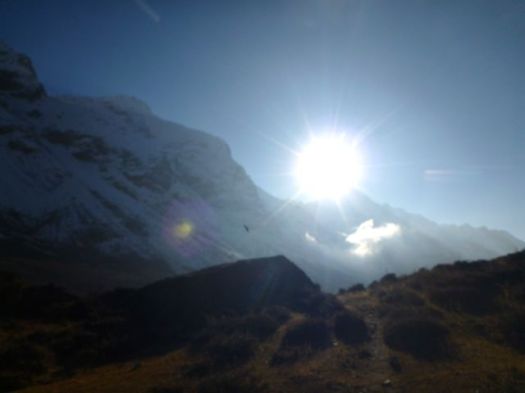
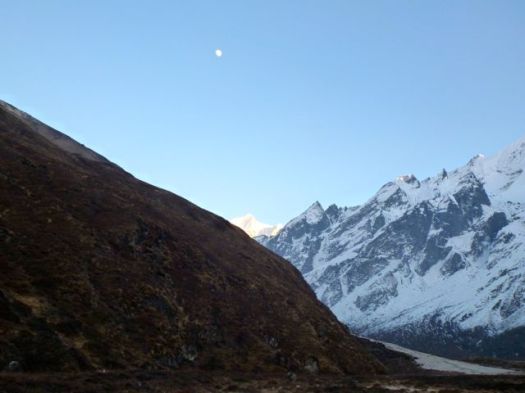
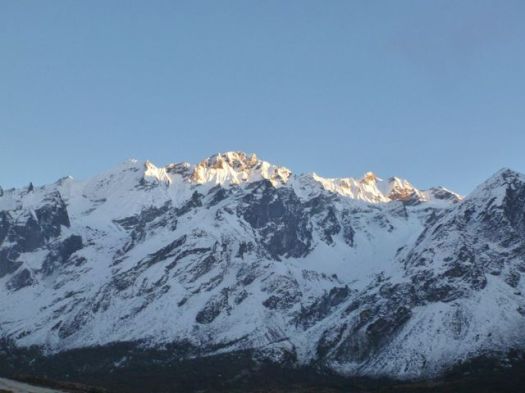
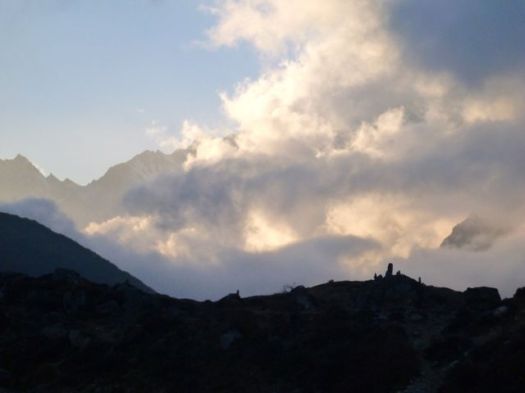
Dawn broke clear and cold.

P1320183

Up to pee and walk down to the river (my water bottle had frozen), plan was to return to my sleeping bag until the sun hit the tent at 7:19am.

P1320184

P1320185

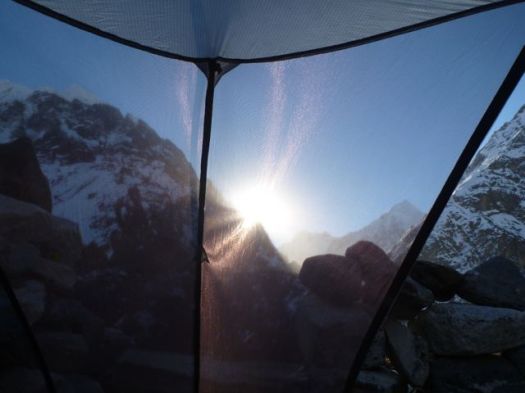
I’d not been cold wearing all my clothing layers, including down parka, in a -3C sleeping bag.

P1320186

A few minutes later, the sun reached the nearby Japanese group.

P1320187

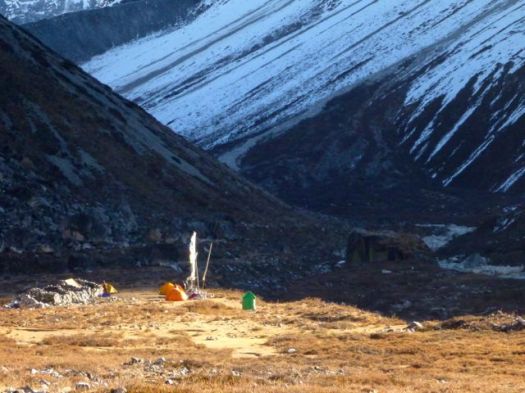
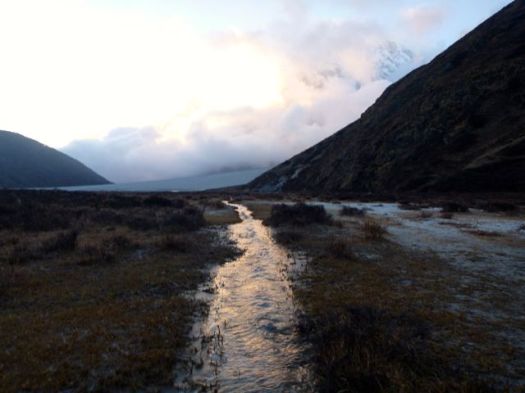
The green number is their toilet tent.

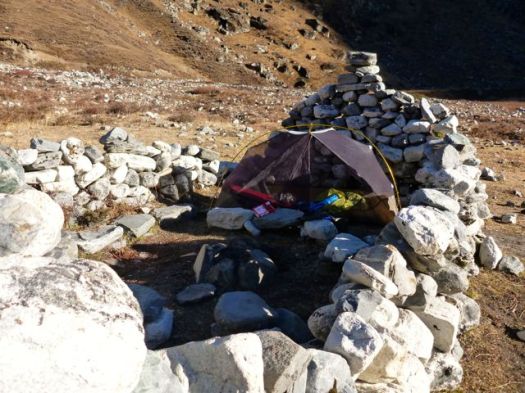
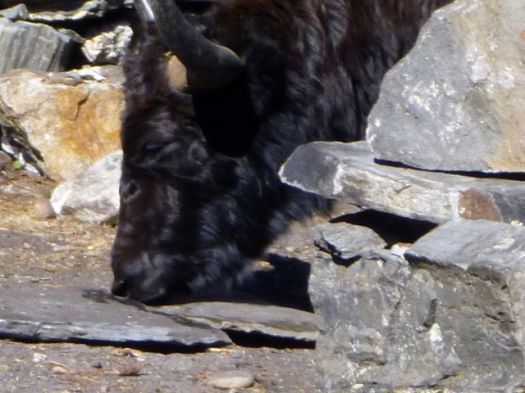
Tenting groups are up and gone quickly in the morning. Yaks move in immediately for urine. Like other mountain mammals, they are salt deprived.

P1320189

P1320223

P1320194

I took an hour before finding a way to cross the icy Langtang without getting my feet wet. Some large expedition had built 3 sections of temporary bridge.

Rick crossing Langtang

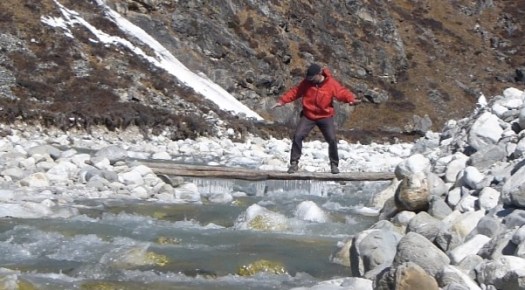
Luckily I’m a gymnast. 🙂

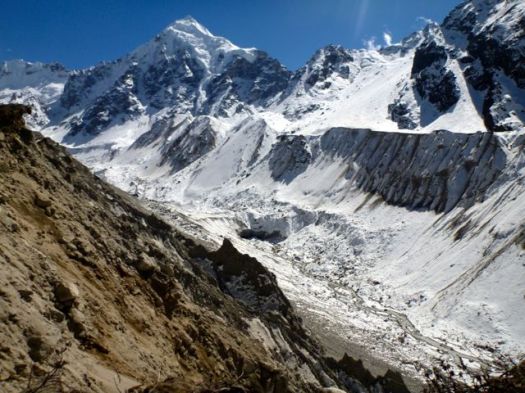
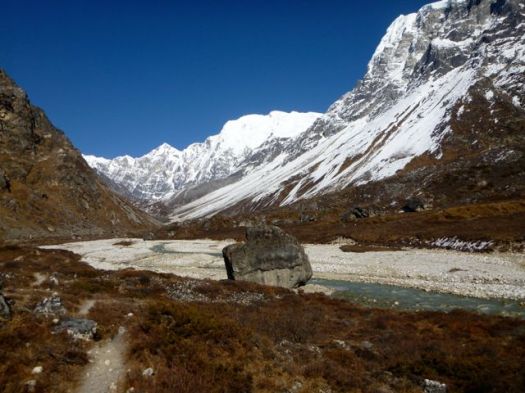
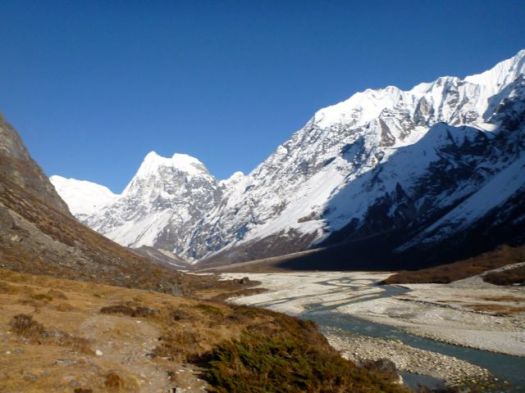
Very few each year scramble up this gap in the high mountains towards Tilman’s Pass, the Langshisha Glacier.

P1320199

Major Harold William “Bill” Tilman … (14 February 1898–1977) was an English mountaineer and explorer, renowned for his Himalayan climbs and sailing voyages. …

During his extensive exploration of the areas of Langtang, Ganesh and Manang in Nepal in 1949, Tilman was the first to ascend Paldor, 5896 metres, and found the pass named after him …

He penetrated the Nanda Devi sanctuary with Eric Shipton in 1934 …

In my wildest dreams I’d hoped to join a mountaineering expedition crossing Tilman’s Pass to make a loop of the Langtang. Finishing at the luxurious Last Resort.

click for larger version

It’s much tougher than I’d imagined. If interested, click through:

• trip report – Across Tilman’s Pass to Naya Kanga 2010

• trip report – Trekking and climbing in the Langtang, Nepal 2009

Even better are Bob’s notes. A Spring crossing.

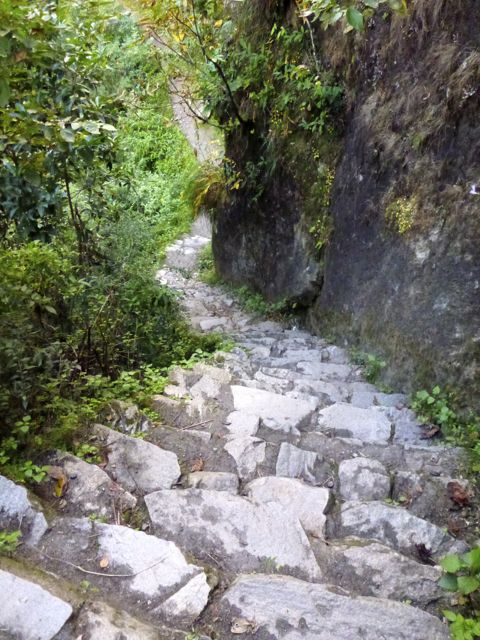
Instead, I scrambled up the easy way. As high as I could go.

About 2hrs up I came across these instruments.

P1320203

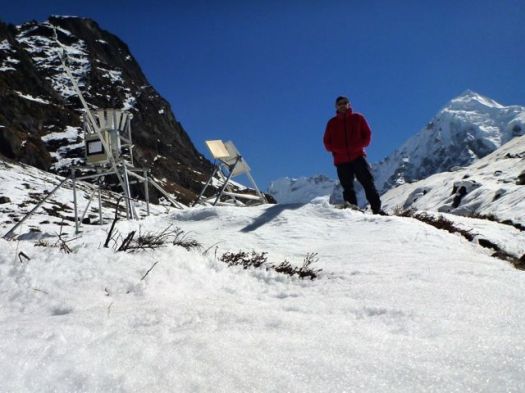
Utrecht University and other researchers are measuring snow and rainfall here.

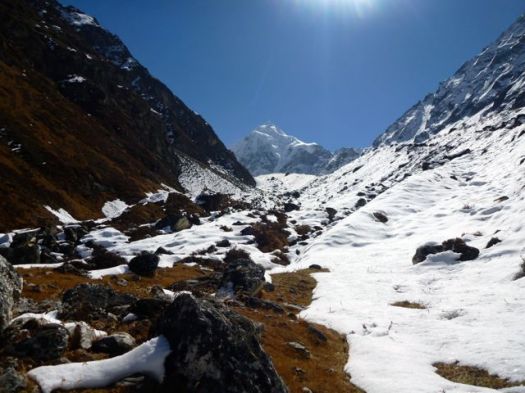
This is as distant on the Langtang as I would get. I believe the lowest notch to the right of the peak is Tilman Pass.

P1320208

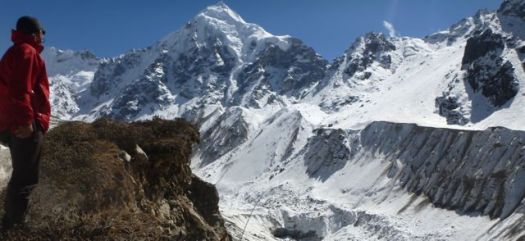
To get there you’d descend to the glacier then climb to the notch. Ugly.

P1320207

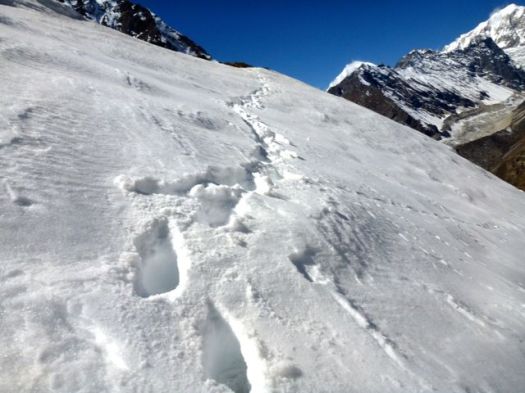
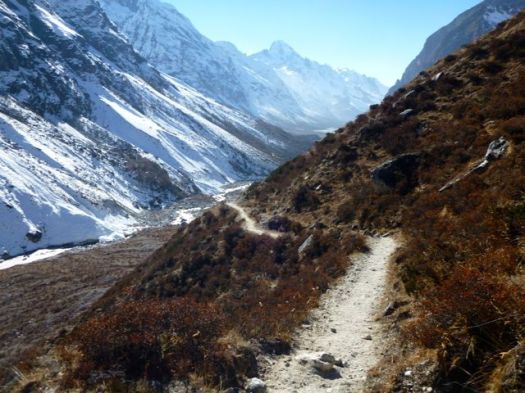
This day hike was fairly straight forward. I did need to work my way through snow at one point.

P1320210

I drank melt water on the way down having brought no food nor water with me.

Psychologically I was ready to turn back. Down is easier. Right?

Unfortunately “Nepali flat” means endless ups and downs. “Nepali down” means endless ups and downs.

You do not see many wild animals on the Langtang trek, but the birdlife is plentiful and interesting.

P1320224

P1320232

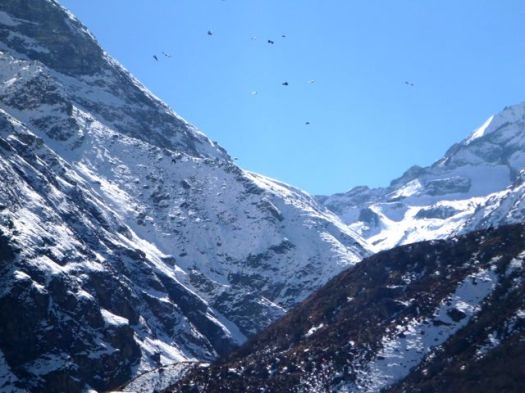
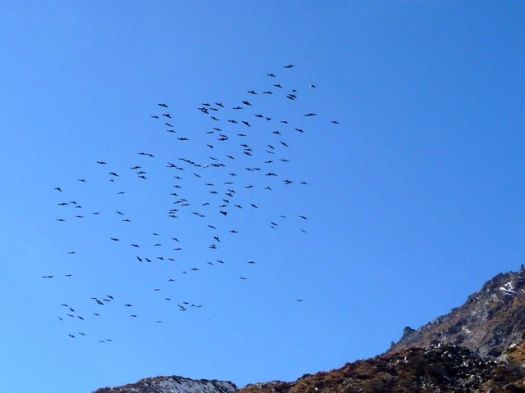
These are swarms of red-billed and yellow-billed choughs. Similar to crows.

By far the last hiker walking back towards Kyanjin Gompa this afternoon, I had – aside from grazing beasts – the valley to myself.

P1320236

P1320238

P1320252

P1320256

Whew.

I was extremely relieved to have made it back before nightfall. Just.

P1320265

P1320266

P1320264

P1320261

Instead of checking in to the Holyland, where I’d already spent 2 nights, I tried Dorje Bakery, instead. Turns out Dorje is not attached to a tea house. But the chef had his brother take me over to one in the family.

I slept well that night. 🙂

day 0 | day 1 | day 2 | day 3 | day 4 | day 5 | day 6 | day 7 | day 8 | info | … Gosainkund

see all my high res photos from this day

Langtang Trek – day 1

Trip report by site editor Rick McCharles

Kathmandu 1400m to Syabrubesi 1503m to Pairo 1800m (Landslide)

I was at the Macha Pokhari bus area in Kathamandu by 6:30am.

There did not seem to be any Jeeps at the Jeep counter, so I went directly to the bus ticket wicket. Very quickly I had in hand an assigned seat on the next Super Express for $5.

P1310743

My assigned seat was the most cramped on the rig! Tight even for a Nepali.

Happily, one of the guides offered to swap my seat for his … beside a gruff, old German client.

Super Express was not bad. Far better and smaller than most Asian buses.

P1310738

The bus did fill. With people. Luggage. And radish.

P1310737

It would end up taking 7.5hrs total to Syabrubesi. Not too bad for Nepal.

We had a terrific driver. Very skilled. Very careful.

Though a Nepali bus (killing tourists) had crashed just a few days before, our cliff edges were never scary close.

The rear view mirror may have been nudged a time or two.

P1310733

P1310749

Only one landslide delayed our upward progress.

I skipped breakfast. Ate only a few Digestive Biscuits at lunch. In my experience, it’s better to ride Himalayan buses on an empty stomach. With an empty bladder.

Instead of lunch, I wandered the stopover town.

P1310742

P1310739

Sections of the journey were pretty.

P1310735

My only one reservation with the driver were times when he and another bus driver played music back and forth using horn and noisy brakes. (VIDEO)

Three times en route we disembarked at checkpoints. The first only looked at our TIMS card. The next two required both TIMS and our Langtang National Park permit.

P1310751

I had paid for both in Kathmandu, but some on the bus were missing one or both. Happily, you could purchase them at the checkpoints.

We disembarked Syabrubesi 1300m at 3:30pm.

I had late “breakfast” and enjoyed free wifi before starting up the trail. Very late in the afternoon.

Everyone else spent the night in town. I was rushed to get high.

P1310754

P1310756

P1310759

P1310760

P1310764

P1310769

I walked about 90 minutes up to Pairo (Landslide or Hotsprings).

P1310778

___
Marketing 101:

Good marketing is calling your lodge Hotsprings. Bad marketing is calling your lodge Landslide.
🙂
___

Great lodge. I had fun my first night chatting with a Brit and his Guide who were boozing, celebrating the end of his adventure. Sadly, the hotsprings were not available as a bridge had washed out. It was supposed to be repaired by the time I came back down trail in a week.

see all my high res photos from this day

___

Heading up trail towards Pairo is by far the most popular start to the Langtang trek. More scenic, but longer and tougher, is starting towards Khangjim 2235m instead. The mantra is “slowly, slowly” on the way up. Walking via Khangjim is slower, better for acclimatization for altitude. I should have gone that route.

day 0 | day 1 | day 2 | day 3 | day 4 | day 5 | day 6 | day 7 | day 8 | info | … Gosainkund

new Nepal trekking regulations?

I’ve just arrived Kathmandu.

Officials in Nepal say they plan to introduce tougher controls of the trekking industry, a week after a devastating Himalayan storm.

In future, all trekkers will be required to register before setting out on the Annapurna circuit, they told reporters.

Only properly trained and accredited guides will be able to lead treks. …

BBC – Nepal plans to tighten rules on trekkers and guides

This news report, like many I’ve seen in the mainstream media, are not accurate. Click over to wikipedia for ongoing updates and an a more objective overview of the tragedy.

Not clear in the media is that all Annapurna trekkers already must register to get their ACAP permit. All Guides are trained and certified.

My best guess is that independent trekking will still be allowed in 2015. The director general of the Department of Tourism, Tulasi Gautam, has to say something.

This for example:

… In future, all trekkers must register at check posts when they enter and leave the popular trail (Annapurna), officials said. …

On Annapurna, Everest, Manaslu, etc., you already check in with multiple checkpoints. It’s been that way for decades.

related – Picturing the Blizzard That Caused Nepal’s Worst-Ever Mountaineering Disaster:

blizzardI’ll be careful. Don’t worry.

deaths on the Annapurna Circuit

Rescuers in Nepal are trying to reach more than 20 trekkers trapped below a high Himalayan pass by heavy snowfalls and avalanches as the death toll from the unfolding tragedy was reported to be as high as 32.

High winds and blizzards hit much of central Nepal this week as the tail end of a cyclone travelling west across northern India reached the Himalayan mountain chain. The head of the Trekking Agencies Association Nepal said there had never been a disaster like it. …

Local officials said 24 bodies had been found on the Annapurna circuit, which circles the Annapurna mountain and attracts thousands of walkers every year.

Guardian

I was there last year. In perfect weather. 😦

Thorong La, 5,416 m (17,769 ft)

There was a similar disaster some years ago. Many killed. Many hikers trapped at the Annapurna Sanctuary.

climb Misti for me

Misti at 5822m (19,101ft) is one of the easiest, most visible, most popular, most accessible high summits in the world. It is recommended for all self-sufficient hikers. If you tolerate cold & altitude symptoms, the ascent is little trouble in good weather.

BestHike editor Rick McCharles 2005

Misti is one of the best trekking peaks in the world — no mountaineering skills nor gear needed if the weather is good

3 days, 25km circuit plus the climb is recommended. Most do it in 2 days, 1 night, however.

Easy access from Arequipa, our favourite city in Peru.

Click PLAY or watch a short Yeti Adventure trip report on YouTube.

Unfortunately, the freezing temperatures, high winds and an incoming storm forced us to turn back without reaching the summit.

We’ve recently moved and updated our Misti information page.

history of Yosemite climbing

VALLEY UPRISING is the much-anticipated documentary from Sender Films about the epic history of climbing in Yosemite National Park and the counterculture roots of outdoor sports.

Narrated by Peter Sarsgaard, the film features digitally-animated archival photography, spectacular climbing footage and interviews with Yosemite greats — from pioneers like Yvon Chouinard, Royal Robbins, Lynn Hill and John Long to cutting edge modern athletes like Dean Potter and Alex Honnold. Valley Uprising tells the story of the bold men and women who broke with convention and redefined the limits of human possibility in America’s legendary national park.

Click PLAY or watch the trailer on YouTube.

To be released Fall 2014.

(via Hiking in Finland)

Walking the Earth’s Spine

This looks great. I’ll try to find a copy in Kathmandu.

When Jono Lineen‘s brother died in tragic circumstances, he gave up a comfortable life, moved to the Himalayas and over eight years immersed himself in the cultures of the world’s highest mountains.

The experience culminates in his book Into the Heart of the Himalayas, a fascinating memoir that traces his solo trekking odyssey from Pakistan to Nepal across thousands of kilometres of mountain terrain. No-one has ever before attempted to walk the length of the Western Himalayas alone, but Jono’s intentions were more psychological than physical. It was about integrating the Himalayan culture he had grown to love, assimilating the wisdom of the place and coming to terms with his loss.

Jono’s openness with everyone he meets on the trail – from Pakistani military officers to Tibetan lamas and naked Hindu Saddhus – lies at the heart of one of the most complete portraits of the Himalayas ever written. Jono Lineen – a lone, disarming man – crosses borders, religions, castes, languages and philosophical boundaries to find the way to embrace his future.

Earth Spine

interview with Jono Lineen

He explains why an adventure from 1995 was not published until April 2014.

Into the Heart of the Himalayas [Kindle Edition]

Walking the Earth’s Spine: A 2,700-kilometre Solo Hike Through the Himalyas

[paperback]

lost on the Heart Mountain Horseshoe

Heart Mountain is west of Calgary, Alberta …

The 2,149 m (6,020 ft) mountain is easily distinguishable by its heart-shaped summit

Heartrte2

At the base of the mountain a left turn onto the flat, good quality, Quaite Creek trail delivers us past a pristine swamp with mirror surface water and back to the car. The 11 KM (7 mile) loop

Hiking with Barry

Barry makes it sound easy. 🙂

Local hiking Guru Kelly Mock recommended that loop, due to an early winter snowfall, but in reverse. Finishing coming down the Hart Mountain trail. We parked at the the Heart Creek trailhead.

P1300741

P1300753

Steve had done the loop before, but in the normal direction. We set off looking to ascend on the Quaite Creek trail.

Heart_Mountain_Hike_Alberta_Topographical

P1300748

Only Sept 13th, there was much more snow than we anticipated. But we hoped the snow would have been blown off the ridges, once we got up there.

P1300776

We tried bushwhacking through deep snow between trees to get up on the windswept ridge.

We tried.

If was tough going, postholing non-stop. For hours. Off trail. 😦

Here’s the highpoint reached.

10687364_689375491152198_2012647043025195073_o

Sadly slipping on that snowfield up to the ridge was a death drop. We turned back, the sun warm, the sky blue, the wet snow … turning to slush.

steep Heart Mtn

Yes. It was steep.

P1300773

We scrambled off trail down a different route, eventually getting back to the regulation track after 8 hours.

10479677_689375787818835_1260580944863415466_o

Phoning Kelly Mock to curse his bad advice, it turned out Kelly had started the Horseshoe in the normal direction, hoping to surprise us half way round.

After a half hour Kelly quit. You’d have to be an idiot to try Heart in these snow conditions. 🙂

Oh well. It was a terrific quad workout.

more of Steve’s and my photos

best hiking multitool – 3 essential tips

guest post by Morry Banes

Morry-Knows-Multitools-Logo-copy654There is a sweet spot in packing for your hike that’s just there between having too much stuff on you and not having enough to be comfortable. Finding this sweet spot is all about getting that balance right between the weight and bulk of the stuff you need to carry and their flexibility and usability.

Today, we are going to look into choosing the best multi tool for your needs. These small sidekicks can weigh as little as one standalone tool and can include up to 20.

But how do you know which one of these babies to choose if you decide that you want it?

A smart decision will call for looking beyond the stars and sparkles. Believe me, anybody who owns a multitool will tell you that the 80-20 rule applies here as well – 80% of the time you will be using 20% of the tools included. If you do the research yourself and read some multi tool reviews, you’ll get to the same conclusion.

So, here is what we are going to do here:

•    show you how to look past the advertising tricks and know which are the pieces that you will get the most use of

•    make sure that you are getting a quality tool that you’ll likely pass on to your family
Enough small talk, let’s talk some specifics:

In a highly competitive market there’s a lot of advertising tricks that can deter your attention from what’s important. So, let me give you some tips on how to avoid that.

Tip 1.    Versatility of a multitool

It’s easy to get distracted by the shine, the toothpicks and whatnots when looking at a multitool. A year later, you’ll find yourself looking at pieces that are there but have never been used. Oh, yes, and you paid for them…so, let’s get our essentials right and let’s spare you of those mistakes.
If you are a hiker, just make a mental checklist and look for a multi tool that will include:

•    well-made sturdy pliers and solid wire cutters
•    stainless steel blades, regulars and serrated ones
•    two types of screwdrivers (regular and Philips)
•    can and bottle opener

Chances are high that you’ll be needing most of these. For everything else just ask yourself if you see them being regularly used. Like a toothpick…or that flimsy small scissors? Or the nail clipper?

Tip 2.    Quality of the materials

Ah, quality, a word that’s so easy to throw around. Of course, every company will say that their product is of “highest quality”. But this is such a vague statement and before you know it you find yourself in a clutter of products that all claim to be of “high quality”.

Let’s cut through that clutter here and really learn what’s quality when it comes to multitools – it’s not that complicated after all:

Sub-tips within the tip 2:

What’s quality when it comes to individual pieces?

•    420 stainless steel, if compared size for size, is much stronger than titanium, and it’s an alloy of steel that has very little chromium (just 12%). In plain terms – it will not break and will last much longer

•    When I said pieces in the tip above I meant everything except the blades – 420 steel is a solid choice and included in most multi tools, but there is something better when it comes to the blades and that’s the 154CM steel. This alloy of steel will hold its edge much longer without the need for sharpening.

•    Titanium, in spite of the fact that it’s not as strong as 420 steel will be better for the handles because it will not corrode or rust

So, if you are looking for a multi tool that will likely last you a lifetime, look for these materials. I hope that makes it clear what “quality” is, and you can now look through the advertising shenanigans.

Some of these shenanigans, as far as I am concerned, are terms like:

•    dye-coat steel – which is a different way of saying “it’s not really stainless steel, we just paint so it looks like it is”…

•    “titanium coated” – this one is my favorite because it looks so good and shiny and it’s very hard to resist. Titanium coating will keep the corrosion off for a while until the coating wears off, and your tool starts to rust (usually about the time you warranty expires).

Tip 3.    Safety

This one is simple, read through the reviews and look for a piece that users report can be safely deployed using one hand.

When I say “safely” I mean without cutting yourself. This is not the biggest deals because any piece that meets the criteria we have set in Tip 1 and 2 will be designed smartly so that you can have the multiple pieces open and still use the multi tool safely.

And yes, look for a multi tool that features safety locks.

Final thoughts

If you are a hiker, it’s very likely that the less-is-more rule applies when you are choosing your multitool.
Everything I said here is aimed at you getting the biggest bang for your buck. The last part of the equation are your needs.

So, by all means, do your research, read multi tool reviews, read what other people say, think about how your experiences compare to those of other consumers and then make a calm controlled decision about the best multi tool for yourself.

If anything I said here sticks and helps in the process, the time sharing my experiences could not be better spent.

Stay safe