These amazing photos are from the 2019 competition.
Click through:
Here Are The Winners Of The 2019 International Landscape Photographer Of The Year Contest (30 Pics)
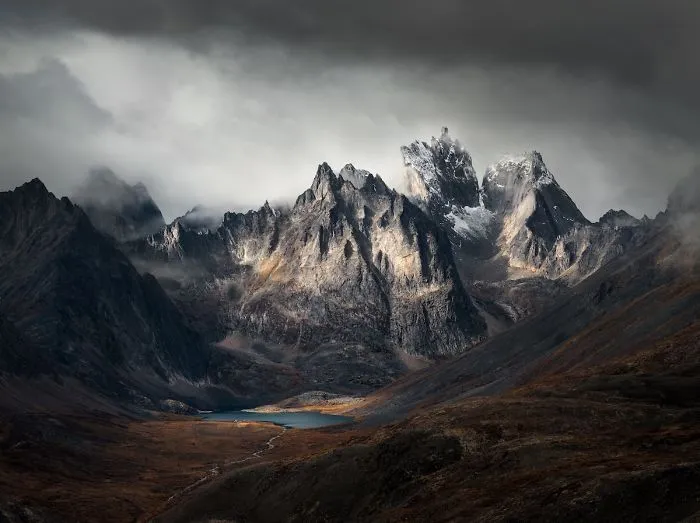
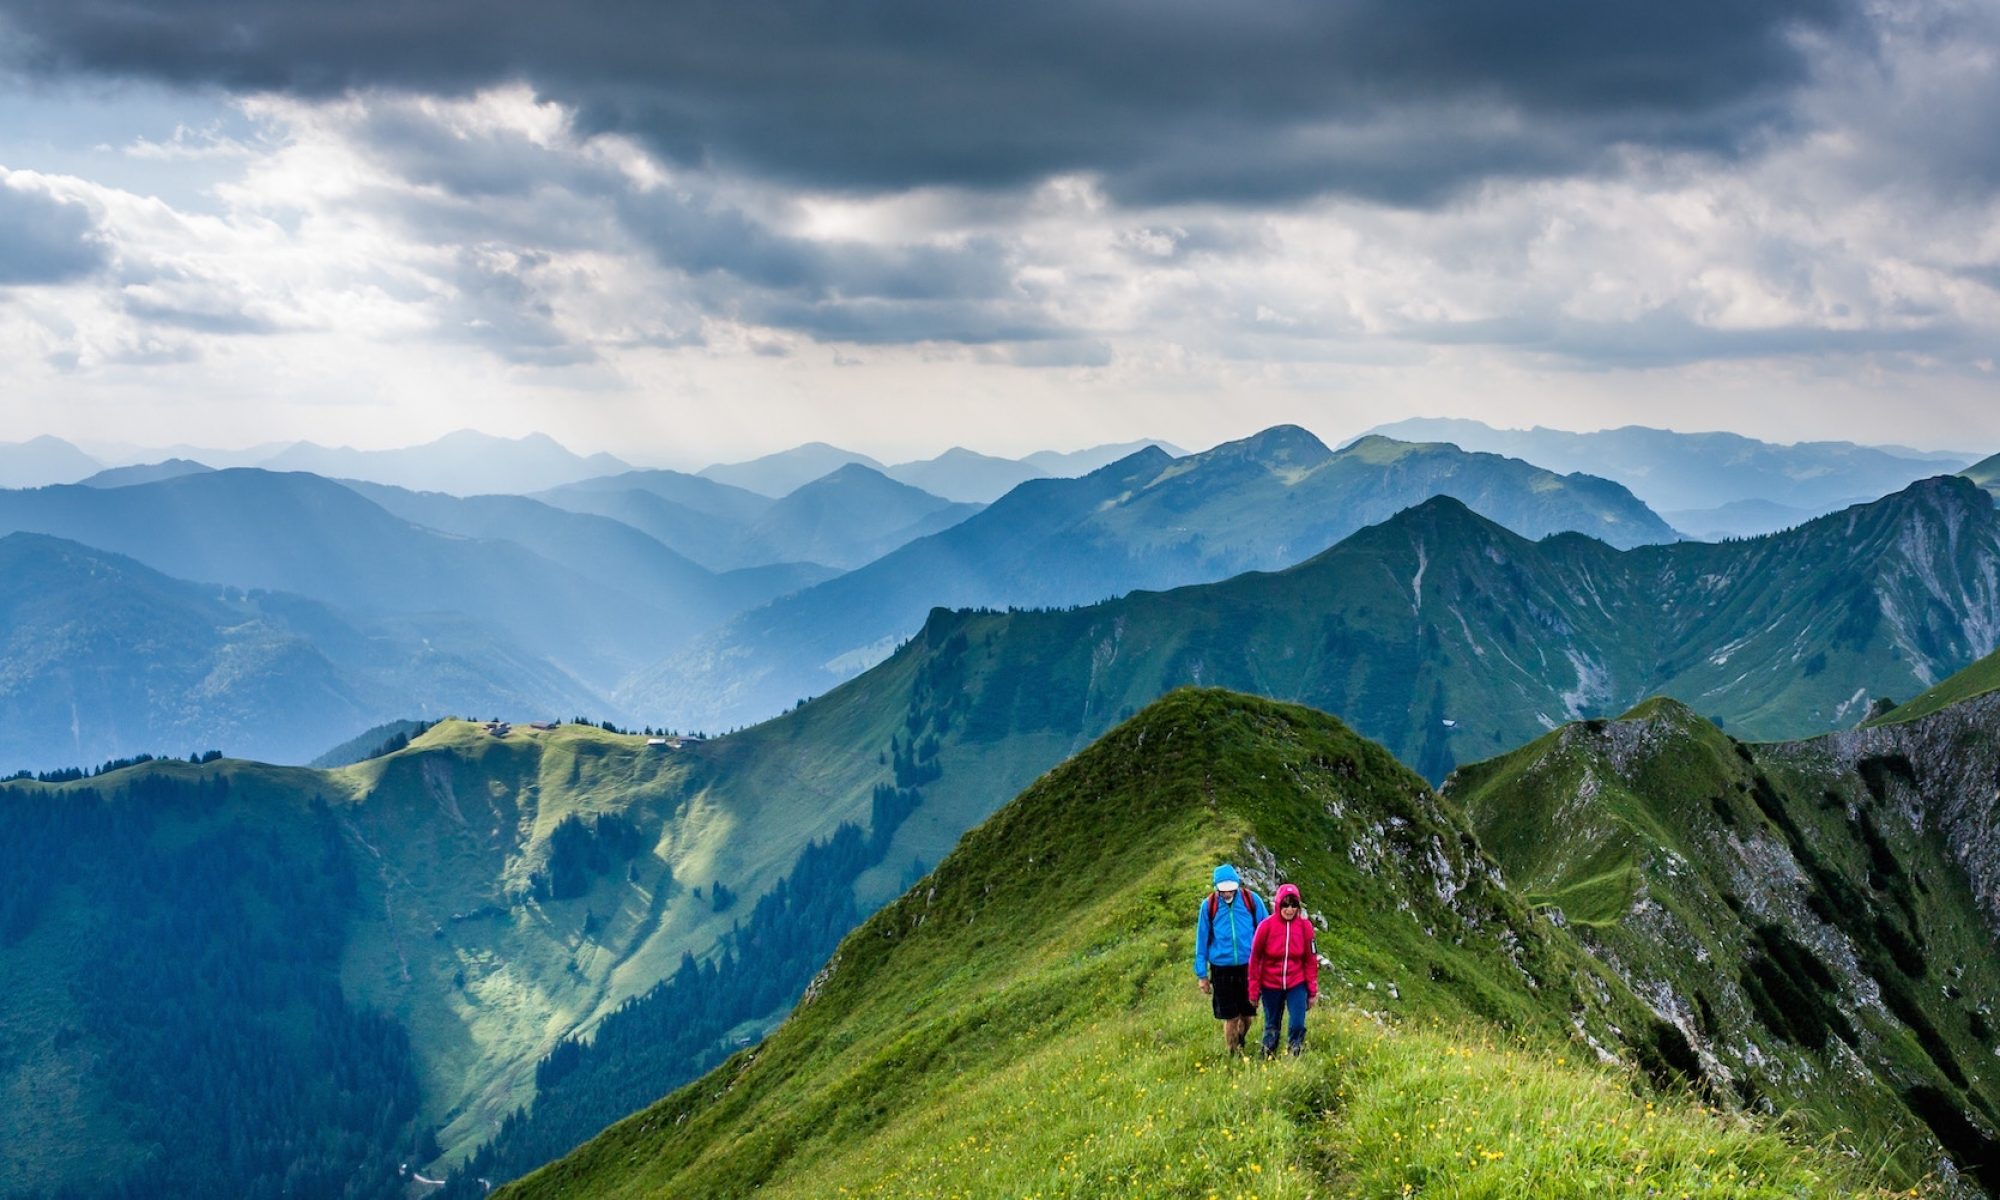
Best hikes, treks, tramps in the world.
These amazing photos are from the 2019 competition.
Click through:
Here Are The Winners Of The 2019 International Landscape Photographer Of The Year Contest (30 Pics)
by BestHike editor Rick McCharles
While traveling, I want to capture VIDEO and PHOTOS as quickly and easily as possible.
BEST for me in 2026 is to simply carry my iPhone 16 Pro. Typically I shoot video in the standard Camera app, 4K, 60 frames / second. HDR in automatic mode.
Only 5x optical zoom is a bit of a limitation, but it’s much better zoom than phones in the past. (I am tempted by the higher zoom in the 17 Pro.)
Depending on the video lighting conditions, I might take the time to lock focus and exposure.

I gave up last year on the Anker MagGo Power Bank, Ultra Slim 10000mAh Magnetic Battery Pack as it was too slow. And tended to overheat.
More often than not, I bring my inexpensive tripod from Fotopro. (Similar to JOBY GorillaPod — but a little better.)

The tripod works like a selfie stick. Or I can quickly set it up almost anywhere.
That tripod has a simple ball head. To it, I attach the Ulanzi ST-27 Metal Phone Clip to keep my phone secure. It fits a large smart phone with cover.
I’m addicted to my Apple Watch — and use the Camera Remote app as a viewfinder for taking photos and videos from a distance. I have that app as one of my Complications on the Apple Watch face so it’s always quickly available.

For multiple day adventures, I’ll bring one or more external batteries. . HEAVY — YES. But they are the safest way to recharge my electronics on the trail. These brutes have saved me many, many times in the past.
Currently my travel favourite is the inexpensive INIU Charger 22.5W 20000mAh with attached USB-C cable as a handle. In fact I’m taking two of these on my next trip as I’ll often be away from electricity.

When I have electricity en route, I use my UGREEN Nexode 100W 5 Port USB C Charger Block.

It can charge 5 devices simultaneously including a laptop, but I find the 4th and 5th (USB-A) really don’t get much juice compared with the first 3 ports in line. Almost all my devices now are USB-C.
If cycling — where weight and bulk are less an issue — I usually bring along a short extension cord. This makes it more convenient to plug into libraries, coffee shops, hostels, shopping malls, etc. (The UGREEN tends to fall out of a loose wall socket.)

I often hike and cycle internationally. Of course I add an international adapter.

For cycling, I often bring along my Insta360 Ace Pro action camera. One extra battery. I have many accessories, but rarely bring any of them.

Well … even trying to keep electronics as fast and easy as possible, my recharging station for bikepacking might already look like this!
Here I’ve added a second UGREEN Nexode 100W 5 Port USB C Charger Block. So could simultaneously charge at least 6 or more devices overnight from one wall socket. A mess. 😀

The BIG decision for me last year was whether or not to take the DJI Mini 4 Drone. The Controller is essential. … In fact, so far I always bring the bulky carrying case and 3 extra batteries. A major commitment.
BUT I love shooting drone video. And I am often willing to suffer with the extra bulk and weight.

Actually, all this gear is not bad when I’m bikepacking. I add even more gear including the world’s best helmet. 😀
Sadly, I lost the Mini 4 in S.E. Asia on the last trip. And have now switched to the smaller, lighter, much cheaper, more durable DJI Neo 1. I call it a toy drone.
Click PLAY or watch it on YouTube.
Mostly I’ll use this drone handheld. No phone. No controller.
For more complicated shots, I’ll take the time to use my phone as a controller.
For long trips, I bring along my old MacBook Air and 3-4 external 2TB SSD drives for back-up and video / photo editing.
I normally leave the Apple charging brick at home, using USB C charging, instead.

Critical for cycling is navigation. I use an old iPhone with a QuadLock attachment to the handlebars. And a rain poncho, when necessary. I keep my Canadian SIM card in this phone to ensure texts still reach me at the end of the world.


I’ll stop here …. though there are times I bring even MORE along in the bike saddle bags. 😀

IF I might need light at night, I’ll bring my tiny Nitecore headlamp and short charging cable.
Anker IQ wall plug for a quick charge at a coffee shop. ??
Bottom line? Show up with your phone and a back-up external battery. That’s what the smart folks do. 🙏
Me? I’ll always have the phone and drone.

For example, for my last international trip (hiking, not cycling) this was my MAIN recharging set-up. One electrical outlet ➙ light extension cord ➙ International adapter ➙ my UGREEN Nexode 100W 5 Port USB C Charger Block ➙ 1) laptop, 2) INUI external battery (charging watch), 3) UGreen (charging phone).
Cables are long for convenience in awkward recharging locations. Cables are high speed. Priority is keeping my external batteries charged for use away from an electrical outlet.

In addition are my devices to be charged irregularly. I’ll do these once the MAIN group of devices is done.
In foreign nations, I’ll put a local SIM card into the 16 Pro.
This is the bulky, heavy drone with 4 batteries. (My next drone is lighter and smaller.)

I do have AirPods, as well. Normally I top those up from the external battery when needed. In fact, I carry a spare AirPod.
I rarely take the Flow Pro 2 Gimbal — but that battery seems to stay charged almost indefinitely. 😀
Electronics are carried in my trusty old laptop case. Drone and accessories, separate.

For 2026 I’ve reduced bulk and weight of electronics. Next trip I’m going to try to combine my laptop bag and day pack into one.
NEW ➙ My day pack cable can recharge Apple Watch, old iPhone, USB-C, and USB-A.
A montage of some of our best photos from the past year.
Canada, Indonesia, Vietnam, Singapore, Taipei, Philippines, USA.
Click PLAY or watch it on YouTube.
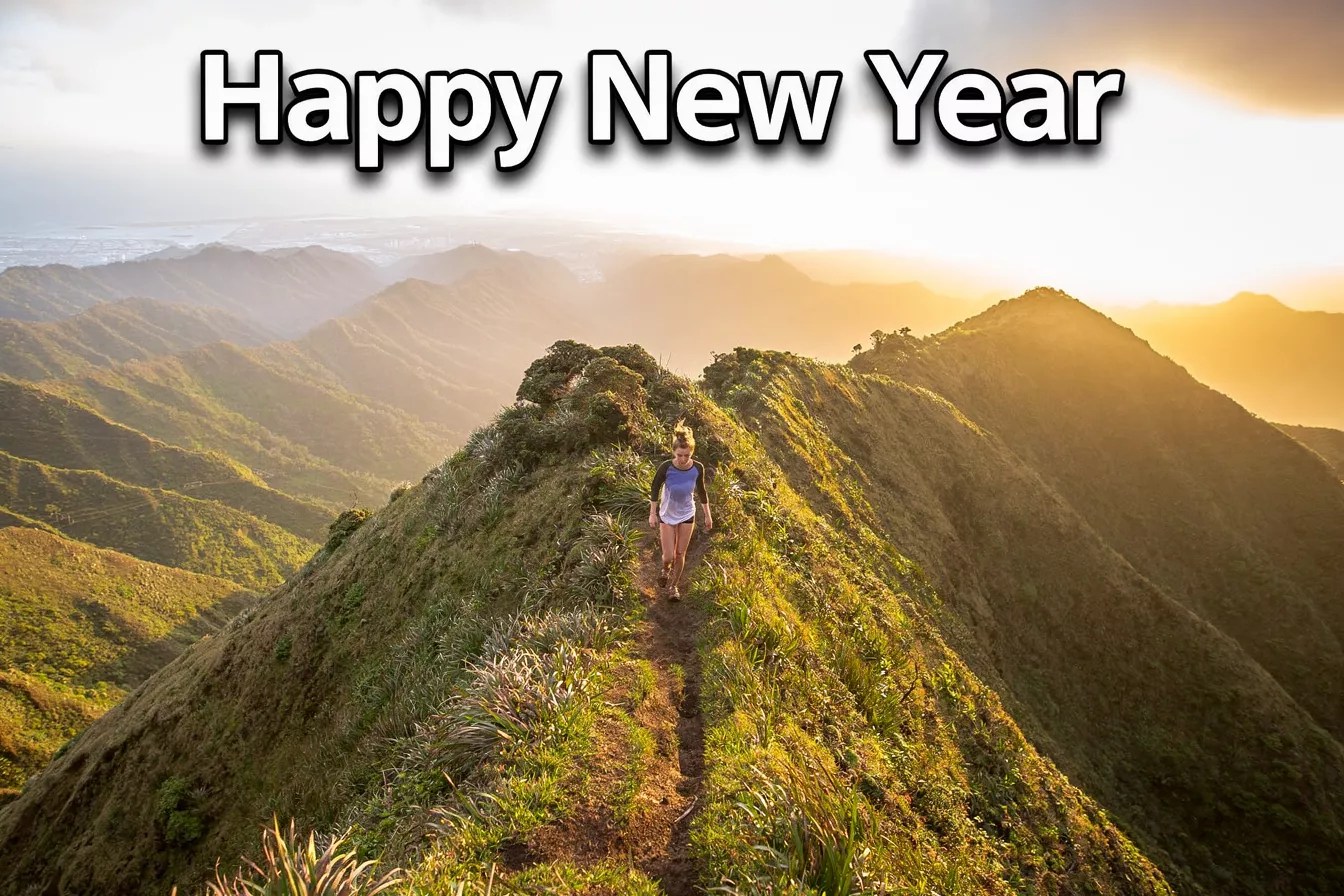
Happy trails in 2026.
Created with Microsoft Designer AI.

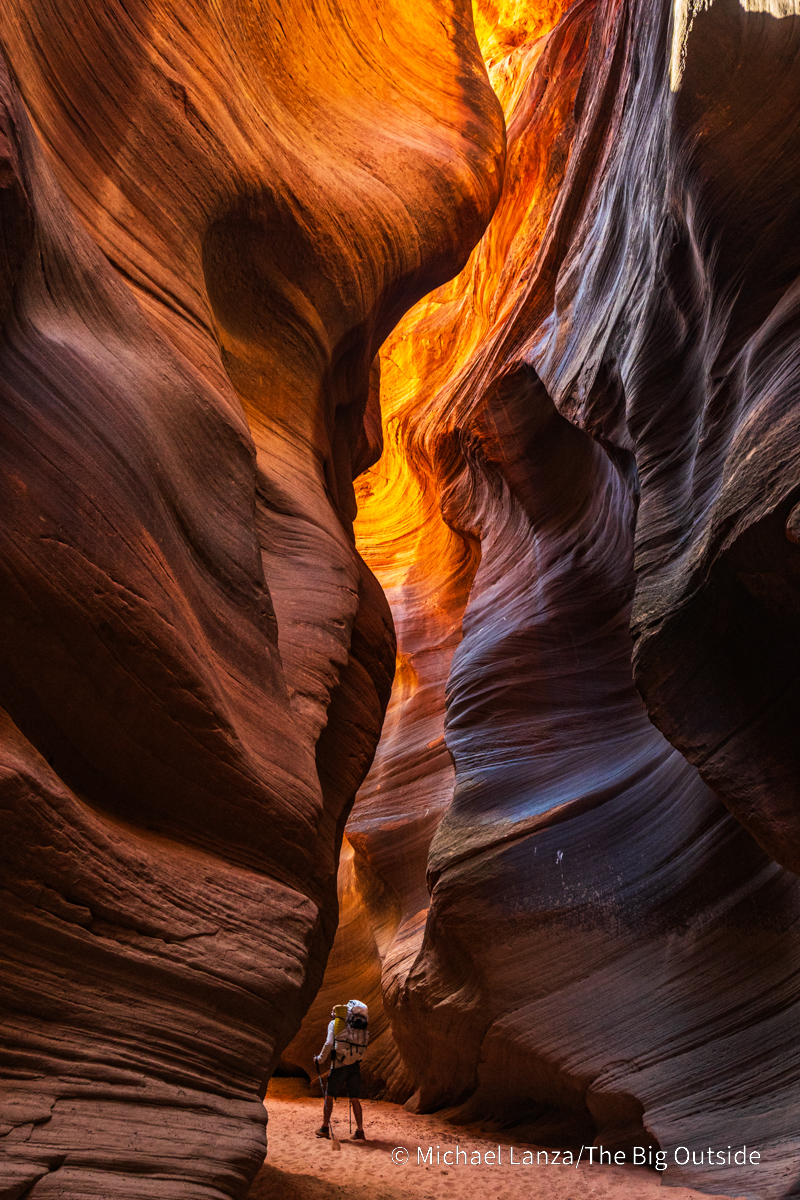
Widely considered the best slot canyon hike in the world!
Michael Lanza wrote-up a terrific trip report:
Before long, the walls stand barely more than shoulder-width apart and perhaps a hundred feet tall and the light at the bottom of this slot canyon grows dim.
We downclimb a sturdy wooden ladder installed for getting over a pour-off that drops several feet.
Little or no direct sunlight reaches us now, only the reflected light hitting the tops of these walls and seeping downward. In rare places where the twisting canyon aligns with the sun, the sudden direct sunlight feels intensely hot, especially in contrast to the pleasant coolness of the deep shade filling most of this slot.
The Big Outside – NOT A DULL MOMENT: BACKPACKING BUCKSKIN GULCH AND PARIA CANYON
Click through for more amazing photos.
related – Clever Hiker – Buckskin Gulch / Paria Canyon, Utah and Arizona
Trip report by BestHike editor Rick McCharles
MOST groups on our itinerary camp on the 1st volcano ridge day 1. Our guide offered us the chance to descend 3 hours to camp at the lake, instead. Super tough 1st day — but we were all glad we did it.

We were up for the dawn. I added milk powder to my brutal black instant coffee.

Banana pancakes excellent, as always.

Driving up to the start at 600m we stopped for a blessing. An important tradition with the local Sasak people as well as Hindus.


Still clean and keen at the start.

They’ve had a lot of deaths on this mountain, the most recent June 2025.
Another died May 2025. Both from falls.
We each had to register with photo ID. The Gunung Rinjani National Park, established 1997, is trying to make this adventure safer — but they have a long way to go. It’s dangerous.

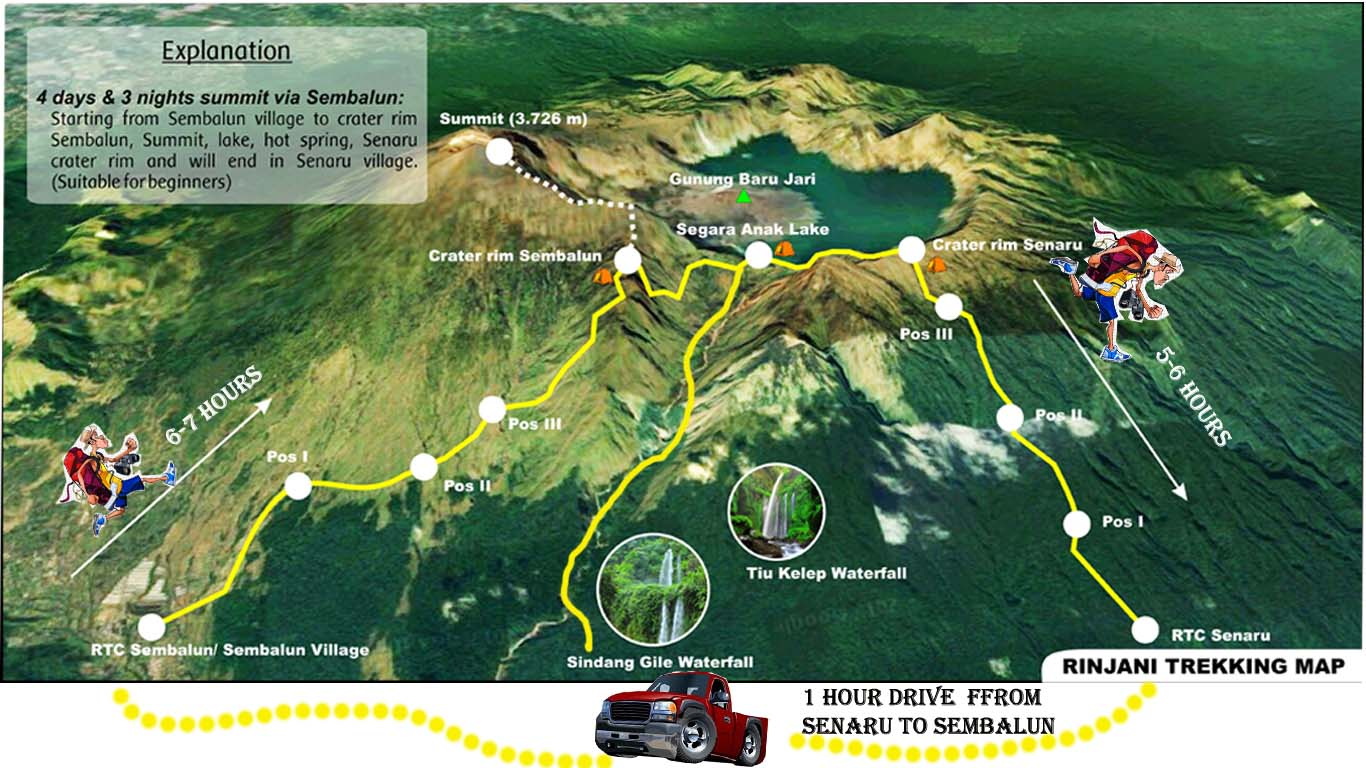
Our goal was the 1st crater rim — only 6.9km. Sounds easy until you calculate you need gain 2km in elevation over that short distance!

We started on the far right of this map.
The start through jungle was relatively easy. THEN it got steep and challenging.

Wherever hikers might stop to eat, long-tailed macaques will be waiting.

These wild cousins are more worrisome than the ‘tame’, well-fed ones in the Monkey Forest, Ubud.

Breakfast !

We hiked into and out of clouds.

Crater rim beckons.

This — really — is the best vista on the hike. Crater lake Sagara Anak is huge, the colour unforgettable. The volcano’s eruption in 1257 is considered one of the most powerful global volcanic events of the last 2,000 years.

We were scheduled to set up our camp on the ridge here at 2,600m.
But we opted, instead, to hike down to the lake at 2000m, saving us 3-4 hours on day 2.
We all agreed to go for it.

OUCH …
That decent is awful and dangerous. I took no photos. We had to concentrate on every technical step.
It was a relief to finally get to the lake. This one of my toughest hiking days of all time.

We arrived just before dusk.

Alpenglow time.

Each group has their own toilet tent.

The alternative at major camps are these good looking public toilets. This one was filthy! But some are quite new. Fairly clean.

Major camps have emergency shelters. I don’t doubt they are used frequently. The trek is risky.

Our guide sent us to the hotsprings with one of the porters. Fantastic. A highlight of the entire trip.

Tim (tim_de_bruijn on Instagram) was a full-time social media manager for a major Dutch soccer team. He showed us fantastic photography tips on his iPhone, including these two. It was pitch dark at the hotsprings!

Pitch dark at camp, as well.

Most amazing of all was his capture of the night stars. Very few of these were visible to the human eye. This from an iPhone 16 Pro Max.

Trip report by BestHike editor Rick McCharles
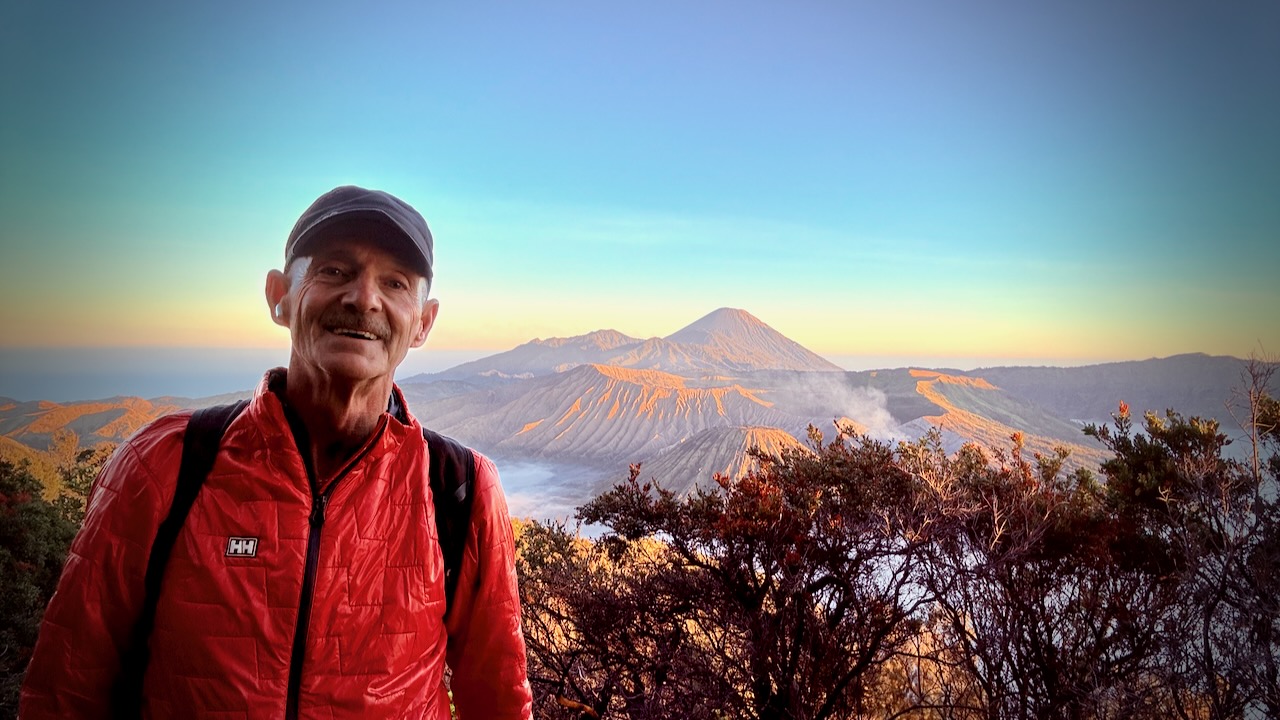
I’ve long wanted to get to this famous vista. It didn’t disappoint.
Mount Bromo 2,329 meters (7,641 ft) is an active somma volcano and Hindu pilgrimage site in East Java, Indonesia.
The name Bromo comes from the Javanese pronunciation of Brahma, the Hindu god of creation.
Click PLAY or watch it on YouTube.
Getting there is a wild ride. Almost everyone signs up for a jeep tour. Only these small Toyota Landcruiser Jeeps are allowed up the mountain.

I departed my hostel in Malang City at 12:45am. It was a scary Mad Max ride over dirt tracks before reaching the viewpoint at 3:15am.
They get you there so early in case of road problems. And jeep breakdowns. It happens.
They also hope you’ll rent warm jackets and blankets. Or buy some souvenirs.

It’s well worth being there at very first light through dawn, in any case. The volcano vista keeps changing. Every photo a possible postcard.
Here are just a few of the dozens I shot.


It’s crowded! Everyone scrambling for the best position.

The adventurous bushwhack down the hillside looking for more unique framing.


I’ll never forget Bromo.

From here the jeep takes you down to the smouldering caldera for a crowded, dusty climb up stairs. I was disappointed with this and the sea of sand beneath. There are many better volcanoes to climb in Indonesia.
Of a number of 1, 2, or 3 day options, I ended up doing the most popular ➙ Bromo Sunrise Tour. Very inexpensive at CAD $50 which includes entry fees.
Itinerary:
Over the years, I’ve taken thousands of photos Rathtrevor Beach Provincial Park close to Nanaimo, Vancouver Island.
Most of those near dawn. I’d enjoy my first coffee of the day on the beach.
BUT summer 2025 I’m relocating back to my home town ➙ Calgary, Alberta.
I’ll miss those Rathtrevor mornings.
Click PLAY or watch it on YouTube. Montage of some of my favourite photos.
See more of my favourite Rathtrevor pics on Flickr.
Of course I’ve made many VIDEOS on Rathtrevor, as well.
My favourite of those is Vancouver Island at Dawn — 4 Seasons 🎵.
Click PLAY or watch it on YouTube.
When I first got into serious VIDEO editing — during COVID — this 2020 edit is another favourite. 😀
Click PLAY or watch it on YouTube.
