GUEST POST by Scott Michelman:
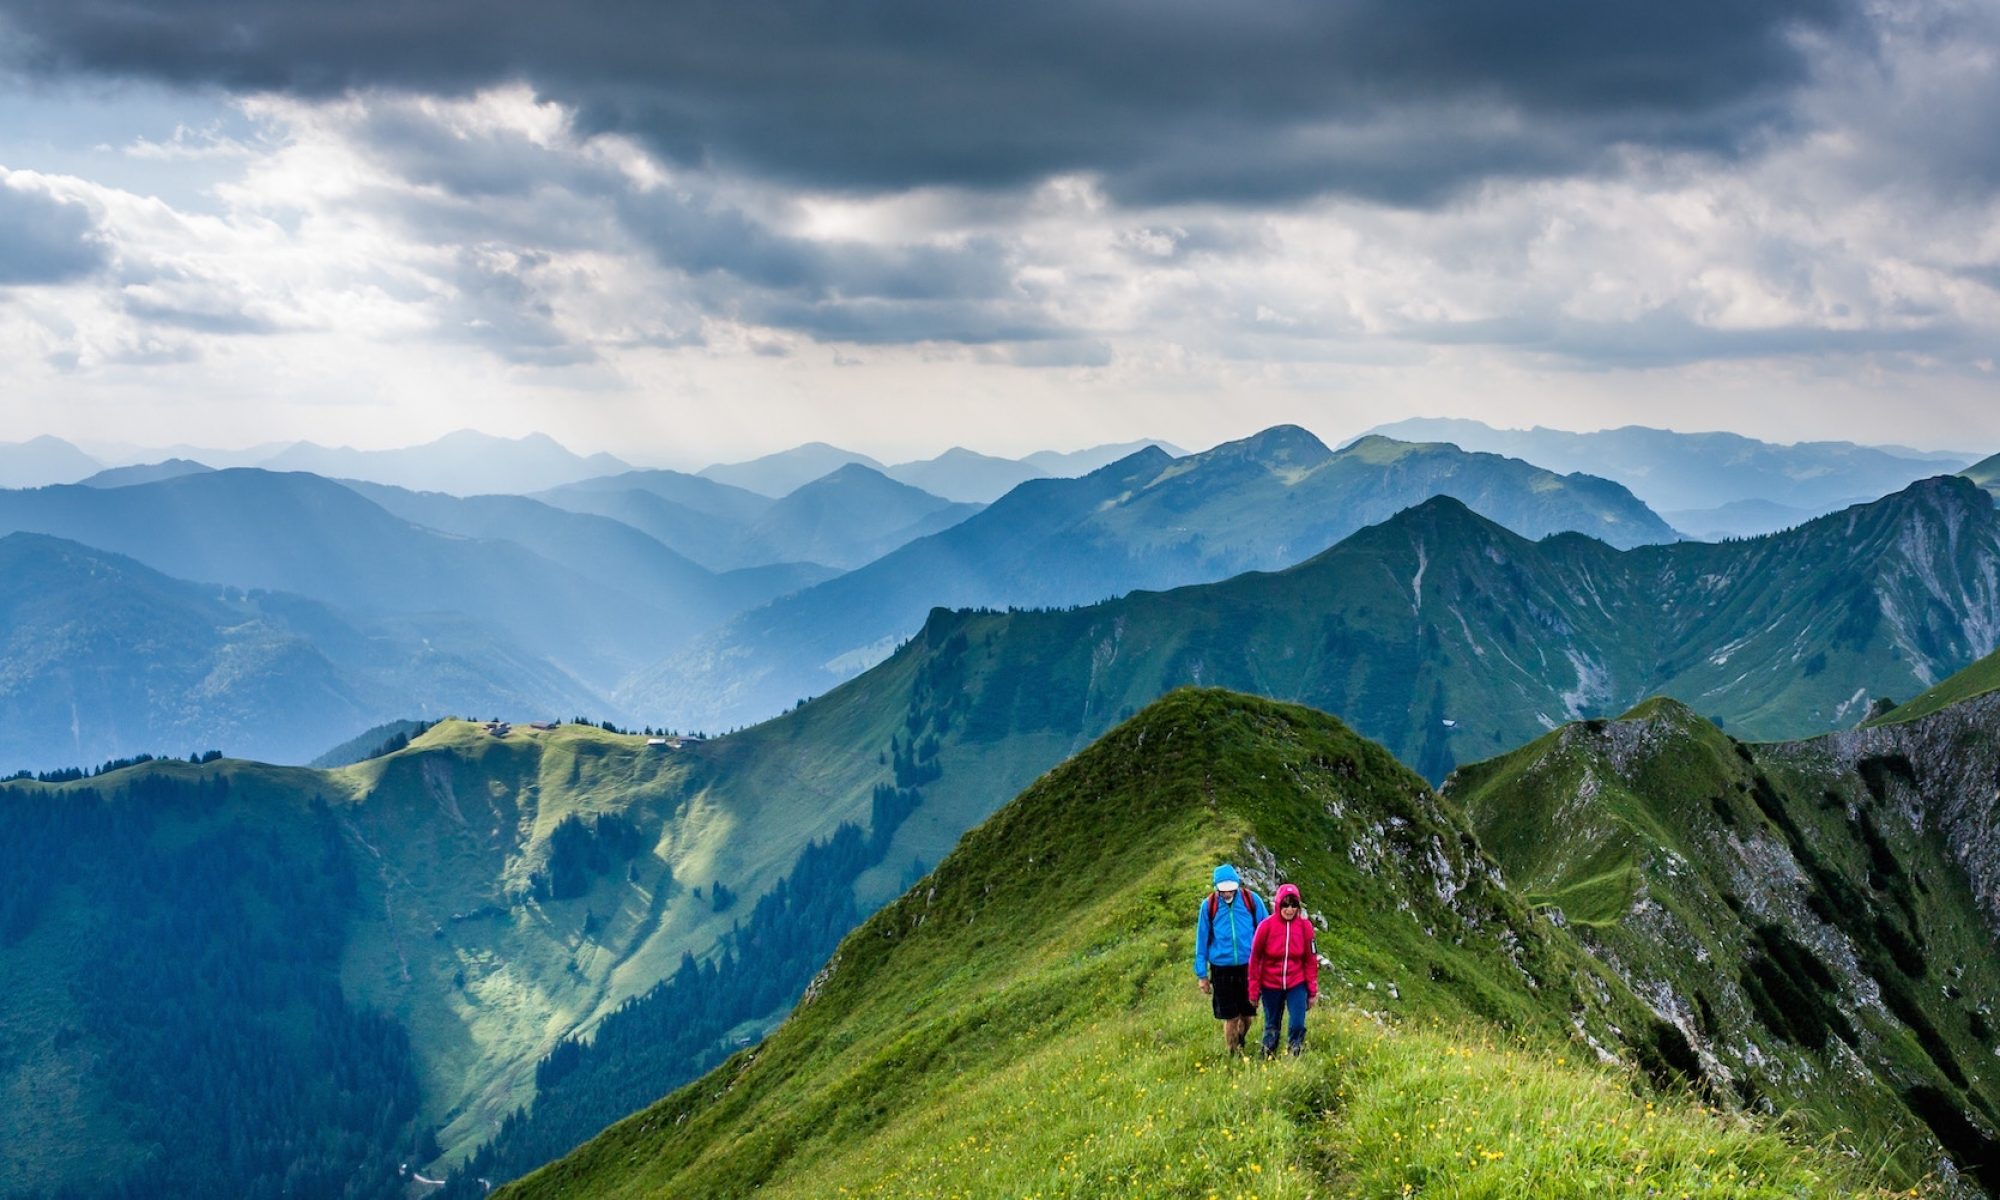
My wife Alison and I are early-thirty-something, moderately (and I do mean moderately) in-shape nature-lovers who decided to dig deep into our long-accumulating frequent flyer miles this past winter (2012-13) and head south to Argentina and Chile, with a focus on Patagonia. We’re not frequent (or, well, ever) travel bloggers, but we ended up putting a ton of time into cobbling together what appears to be an unusual Patagonia itinerary and loving the experience, so we wanted to share what we learned in the hope that it helps somebody else who wants what we wanted.
So what did we want? We found ourselves somewhat stuck in the middle of the two travel models most bloggers and guidebooks presented for this region. According to what we read, there are generally two types of Patagonian trips: posh and crunchy.
The posh version, for people with spending lots of money and perhaps limited time, involves comfortable-to-luxurious hotels, private transportation, and hired guides.
The crunchy version, for people spending less money but more time, involves roundabout bus travel, camping, and carrying everything you’ve got on your back. While each of these visions has its advantages, we came to this vacation (a) on a moderate budget, (b) with some significant time off from work by U.S. standards but not a ton — we weren’t fresh out of college or able to take advantage of generous European holiday allotments, and (c) as avid day hikers who prefer to travel light and finish the day with a shower and a bed. No value judgments intended — one of us grew up traveling “posh,” the other spent college summers working at a pretty “crunchy” wilderness camp, and we just kinda naturally met in the middle. Anyway, we found it challenging to get everywhere we wanted to go without a lot of money, a lot of time, or an interest in camping. But we found a way to do it that really worked for us — hence this account.
This is what we learned:
For starters, a few general thoughts.
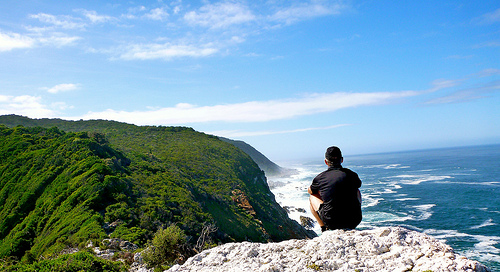
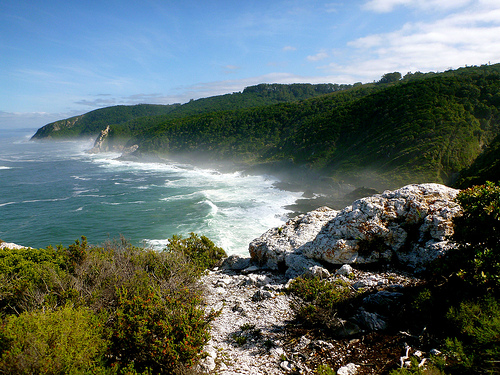
(1) Patagonia is amazing. It’s absolutely worth the long flight and the complicated logistics. We were a little worried that the websites we’d read had built it up too much and it couldn’t match the hype. We were wrong. Comparable places for natural beauty, including great hiking, glaciers, lakes, mountains, and wildlife are the Alaska coast, the Canadian Rockies, and the Southern Alps of New Zealand, and Patagonia combines some of the best features of all three in a landscape that is happily uncrowded. (Many bloggers do complain about the crowds in Torres del Paine National Park, but it’s all relative — I’m sure there are much more remote places to be found, but compared to our usual stomping grounds in the western United States, it was pretty serene).
(2) That last point bears stressing. We went in the height of summer tourism season, right after New Year’s, and we didn’t find it crowded at all. This is not to say you should show up without a reservation — some of the lodgings were full, and we’re glad we booked in July-August for a December-January trip. But it’s a big enough place, we didn’t feel hemmed in by other tourists. We went hours hiking without seeing anyone.
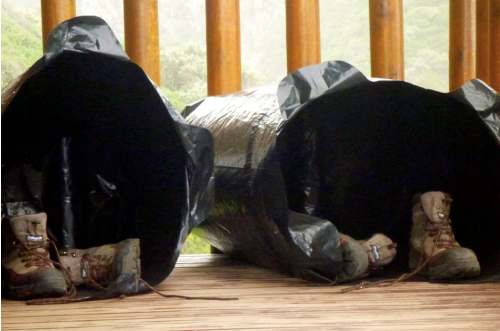
(3) Be prepared for variable weather — everything the internet tells you about layering and rain gear is true. But don’t let it discourage you from going. We found that when the weather was murky, we could wait a few hours and things would change — one of our best days started out with a downpour, then the afternoon was amazing.
(4) Be careful with airlines and build in some flexibility. Having been warned, we stayed away from Aerolineas Argentinas, which turned out to be a good move — we met three separate fellow travelers whose flights had gotten cancelled, luggage lost, or otherwise had serious difficulties with Aerolineas. We went with LAN, which has a South American pass that saved us some money. But there were a few surprises there too — they changed two of our flights a month before we left, so we had to rearrange a few things.
(5) It is possible to do Patagonia cheaply, but in order to get the most out of the experience, we wouldn’t advise trying to do it on a bare-bones budget. There are a few tours that are worth shelling out some extra money for. It’s a special place and a long way to come, so try to make the most of it.
Now the specifics of what we did and how:
(6) El Calafate, Argentina. Perito Moreno Glacier is beautiful.

We did Hielo y Avenura’s “minitrekking” tour, which includes seeing the glacier from an overlook, a boat ride up to the glacier, and a 2 hour hike on the glacier itself, complete with crampons (shoes with little ice-picks on the bottom).

Pricey (about US$130 pp) but absolutely worth it. Beautiful views both on the glacier itself and from the boat. Alison was a little nervous beforehand about the stability of the ice but when we got there it felt perfectly safe. There’s a longer glacier tour available from the same company (the tour is called “big ice”), but we were very satisfied with the time we got out there, and didn’t think upgrading was necessary. El Calafate is a cute town, very outdoor-focused with some decent food, but there’s not much to do in town itself. Note that all the tours leave early in the morning so plan accordingly. Also make sure to get reservations before you come to town in high season — we met a disappointed fellow traveler who missed out because she lacked reservations. We were satisfied with one day there for Perito Moreno. There are other glacier tours that see more; they are much pricier, as far as we could tell. The hotel where we stayed, Picos del Sur, was perfectly nice and — much to their credit — gave us a BETTER rate than they had advertised when we booked. (How often does that happen?) It was a little walk from downtown, but we didn’t mind.
(7) El Chalten, Argentina. We hear the hiking is amazing. We had to skip something in terms of time and expense, and this was it. It’s a long bus ride from El Calafate, and we thought we’d get our hike on in Torres del Paine, Chile. But don’t take its absence from our itinerary as a sign that we know something you don’t.
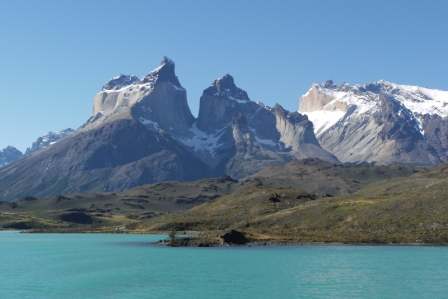
(8) Getting to Torres del Paine, Chile. Torres del Paine is a (perhaps THE) crown jewel of Patagonia. Another must-see. But if you’re crossing the border, TdP can be tricky to get to, particularly if you’re on a tight timetable. (This is less of a problem if you just stay on the Chilean side, but we really wanted to see Perito Moreno and recommend you do, too.) Most people coming in from Argentina take a bus from El Calafate to the nearest town on the Chilean side, Puerto Natales, and then another up to the park. But if you look at a map and the timetables, you’ll discover that this roundabout journey can kill most of a day. After some research, we booked a one-day tour of TdP from El Calafate, which worked great. It’s a direct ride into the park, so we were there by 11 am. We got an overview of the park, saw some of the sights one can see easily from park roads, then in the mid-afternoon, having seen just about all the tour was going to show us, took our leave and began our own exploration of the park. The tour operator was Always Glaciers. Again (like Hielo y Aventura, see #6 above) it was pricey (around US $140 pp including box lunch), but saved so much time busing between other cities that it was worth it. (By the way, we thought about renting a car, but between the border issues and the horror stories on the internet about local rental car companies and road conditions, we thought best not to chance it.) Keep in mind that if you cross the border without hitting a Chilean town (as we did on this one-day tour), you’d best have some Chilean pesos on you if you don’t want to get soaked by the exchange booths at the border. Do, though, ask in advance (before you leave for your trip) where in the park you’ll need cash, where you can pay by card, and where you can pay with U.S. dollars or Euros. If you are camping, note that you cannot cross the border with food.
(9) TdP: Salto Grande. This is a waterfall we saw on the Always Glaciers tour. Definitely a highlight, and not a strenuous walk from the park road. The color of the water was a breathtaking blue.
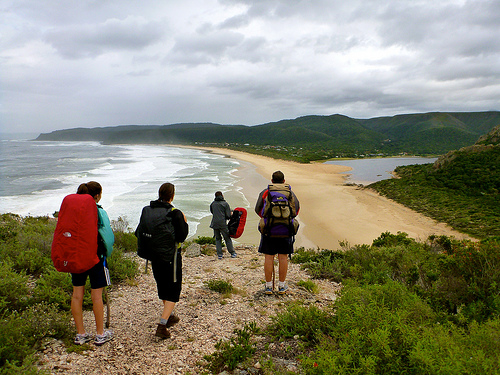
 (10) TdP: General Approach — How to hike the W as a series of day hikes. The famous “W” route, named for its shape, goes in for a lot of internet hype and we found it well-justified. All three legs have something different, and all three are great hiking. But figuring how to do this given our constraints — didn’t want to spend a fortune but didn’t want to carry all our belongings or camp — was challenging. There are some hotels in the park that are not on the W route; these run shuttles for guests to various points on the W for day hikes. But the hotels are more than we wanted to pay ($200+ per night not including food) and the intra-park shuttles are extra. Hiking the “W” the posh way means dropping easily $300-500 a day on meals, lodging and transport for two people. Also some of the hikes on the W (particularly the middle leg, the French Valley) are sufficiently long and difficult to reach by road that you can’t do the whole thing if you’re not staying somewhere near the route. The other main option, aside from the off-W hotels, is to take on the W by foot, moving between either hostel-like lodgings (called “refugios”) and/or campsites along the route. The camping wasn’t for us. (FYI: it addition to wanting beds, heat is a big draw for indoor shelters — between the nighttime temperatures and the winds, camping looked really, really cold, even in Chilean summer.) And even hiking from hostel to hostel would have required giant packs for the multi-day trek. Remember, we are enthusiastic but not fabulously in shape. So we cobbled together this plan: we picked two strategically located refugios and used them as bases to explore the various legs of the W as day hikes, leaving everything we had except a day pack in the refugios for the day. Operating this way, we saw all three legs of the W, along with the trail connecting the left and middle legs, over the course of 4 days. Without too much on our backs, we hiked a total of 44 miles over that time — and they were some of the most beautiful miles we’ve hiked in our lives — all while coming home at night to hot meals, showers (admittedly not always hot), and warm beds. The refugios are not luxury, but they’re generally well-run, serve decent food (hot dinner, hot breakfast, and packed lunch for your day hike), and provide reasonable accommodation. The prices are high for a hostel (figure up to US $100 per person per night), but given that this included meals and — most significantly — that we were paying for the location, we thought we got our money’s worth. Also that price included rented sheets, bedrolls and towels (three fewer things to pack), and our favorite of the ones where we stayed, Refugio Paine Grande, had not only big group rooms but also some double rooms, so we even had some privacy (note: no guarantees on getting these). Paine Grande also had electrical outlets, which would have been good to know in advance — we over-planned for electricity, bringing not only the converters to use our U.S.-style plugs in Chile but also an extra camera battery we didn’t end up needing because we were able to charge up. The refugios stored our stuff while we hiked, for a couple of bucks. (It’s possible we could have left stuff in the rooms, but we didn’t want to chance theft.) Overall, we were thrilled with the arrangements — just the right balance of location, comfort and price. The trickiest part of this plan is moving between refugios with our stuff (we each had one U.S.-carry-on-size, rolling suitcase in addition to our hiking day-packs), but if you time it right and do your research, there ARE ways to move by boat or bus between refugios. This is the hardest thing to get information about, but call the park office for timetables on the catamaran that runs three times a day, 10ish, 12ish, and 6ish, across Lago (Lake) Pehoe from a small cafe near the park road to Refugio Paine Grade at the bottom left corner of the “W” (the two ends of the catamaran route are called Pehoe and Pudeto).
The park office can also tell you about the shuttle from Laguna Amarga (one of the park visitor centers, on a park road) to Refugio Torres Central (at the bottom right corner of the W). You’ll need to pay a driver — usually a tour bus with some extra seats — to take you along the park roads between the boat launch and Laguna Amarga, but we didn’t have much trouble doing that; there are tours throughout the day, and noon is a good time to find them at the cafe at Pudeto. It’s a bit of a negotiation and you need to be comfortable walking up to a bus and asking for a lift, but it’s only a few dollars U.S., and everyone we met was very friendly. Speaking Spanish (as Alison does) helps, but is not necessary.
(11) TdP: Play by play. If you’re still with us to this point, and you like our approach, let’s fill in the gaps and tell you exactly what we did in case you want to borrow some or all of the itinerary.
(a) We left our tour bus from El Calafate (see #8, above) after seeing Salto Grande (#9 above) in the middle of our first day in the park (we’ll call this TdP arrival day “Day 0”), at Pudeto. There’s a little cafe where you can have a snack (it’s a bit expensive, but so’s everything in the park), and wait for the last catamaran of the day across Lago Pehoe (around 6pm). Cafe was comfy and a pleasant place to rest. Boat ride was about US $25 pp for a round trip ticket, as I recall — and worth it: in addition to being a key transportation link for us, it was absolutely beautiful seeing the mountains and the azure water. We found the catamaran an attraction in and of itself. Some logistics: no need to buy tickets in advance — you buy the tickets on the boat (one-way or round trip). We were worried it would be too crowded and we’d miss it, since there are only 3 per day each way, but it wasn’t a problem for us. Sometimes we saw lines waiting for the catamaran, so just in case, I’d get there 30 minutes early for the boat (if you have the ability). But even if you don’t, we imagine you’ll get on. We finished Day 0 at Refugio Paine Grande, in a private double room (bunk beds, though, so not exactly romantic), having had a decent meal at the refugio.

The refugio confirmed they had no problem looking after our stuff (for a couple dollars US? can’t recall) the following day while we hiked, and had comprehensive weather information to help us plan.
(b) Based on the weather report, we decided to hike the middle leg of the W, the French Valley, on Day 1. This was likely to be our longest hiking day (18 miles round trip, which combined with the elevation gain made for a serious challenge) so when we heard the weather was supposed to be clear, we jumped at it. A great day! Beautiful all the way — first a mellow walk around a lake on the way to Camp Italiano, the gateway to the middle leg, then the hike got steeper and more beautiful as we climbed into the mountains, in the shadow of a glacier and at times following a glacial stream up the valley.
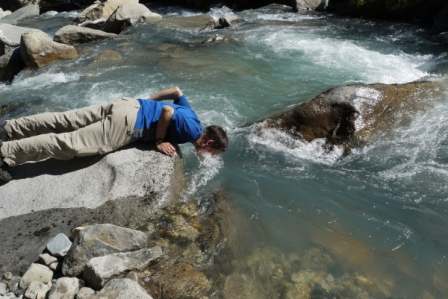
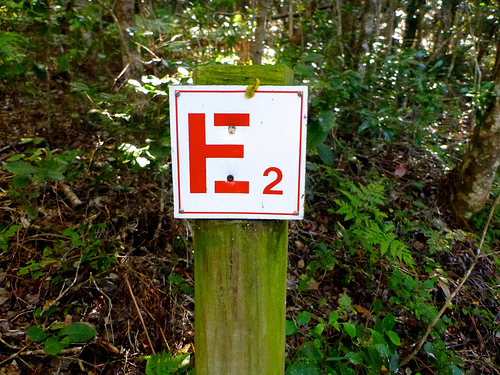
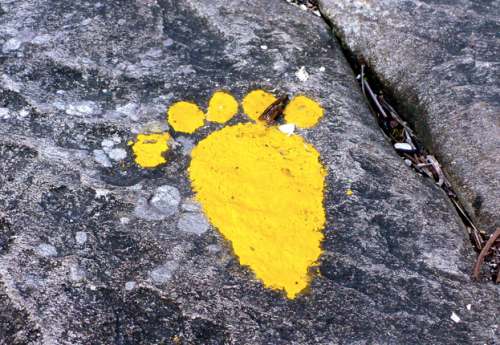
Occasional glaces back over our shoulder were rewarded with spectacular panoramic views, and at the apex of the journey, at Camp Britanico, we were surrounded by tall monoliths glowing in the afternoon sun. On the way, stopped to drink straight from the stream. Delicious. (Also safe, it appears. Following guidance from the internet, we made sure we were upstream of a campsite and drinking from water that was flowing and at least six inches deep. Neither one of us got sick.) A couple notes: the trail is sometimes hard to see; look for orange blazes (streaks of paint) to fine your way. Also, if you are trying to stick to outhouses rather than peeing in the woods, the bathrooms at Camp Italiano are fine, but bring your own toilet paper. Total hiking time: 11 hours. Stayed again at Refugio Paine Grande.
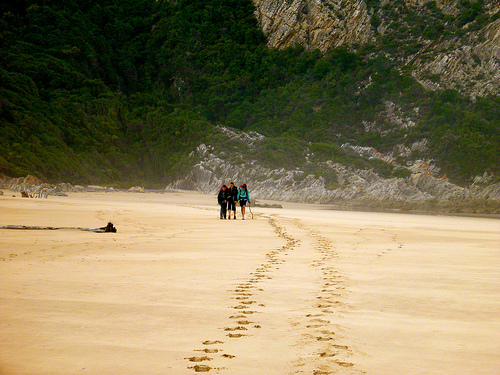
(c) Whether because of the drizzly morning weather on our Day 2 or the fact that we’d already gotten cozy with Perito Moreno glacier in Argentina, we found the leftmost leg of the W, the hike along Lago Gray, the least inspiring of the three leg. (Also we were unpleasantly surprised by the amount of elevation loss and gain — many maps make it look like you’re just walking along the lake and as a consequence underestimate the hiking time.)

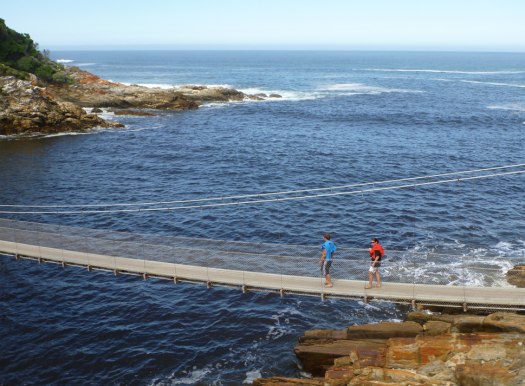
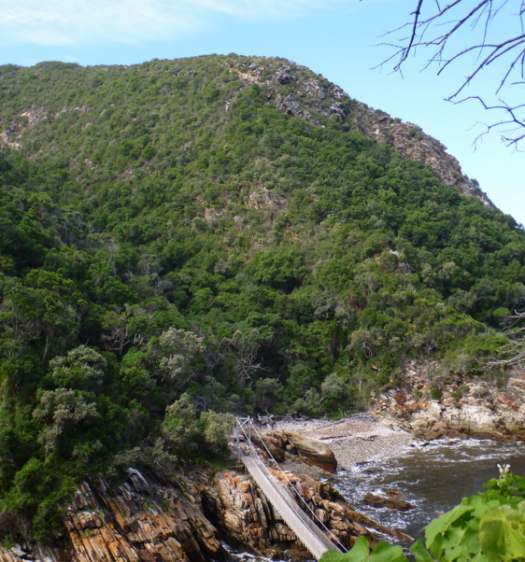
So if you are going to El Calafate also and have to skip one leg of the W, skip this one. That said, when the sun came out later in the day, the view of Glacier Gray across the lake was great. Make sure you walk to the end, past Refugio Gray, to reach the mirador (i.e., lookout) of the glacier — the view is stunning, and you can see icebergs in the water that have broken off of the glacier and aren’t visible from other parts of the trail. One note of caution: the bridges in TdP are not necessarily up to the standards of a U.S. National Park, and about 2/3 of the way from Paine Grande to Refugio Gray, there’s a particularly scary-looking bridge that is hanging on by a not-too-sturdy slab of wood and looks like it could fall down any moment. It didn’t on us. Hopefully they’ve repaired it by now. Total hiking time: 9-9.5 hours. One last night at Refugio Paine Grande.
(d) The first part of Day 3 involved some transit logistics — this was the price of our insistence on day-hiking rather than backpacking the W straight through. But we were grateful for the time spent riding rather than walking, since the first two days were tiring, and the second half of Day 3 and the morning of Day 4 were to be pretty intense as well. In the morning of Day 3 we took the catamaran back to the cafe at Pudeto and, when we saw a bus stopped there, negotiated ourselves a ride to Laguna Amarga. Only a couple bucks a person, and a couple more for a guaranteed ride out of the park to Puerto Natales, the town nearest the park, the next day — the driver Juan promised to save us seats on his bus the next afternoon from Laguna Amarga. Some of the buses we saw later on looked nicer than the one we ended up with, and our ride was bumpy, but we didn’t mind. The stressful part was knowing that our plan depended on finding a ride and not having reservations in advance. Fortunately it wasn’t a problem. I think if we hadn’t met Juan there would have been other options. We reached Laguna Amarga in the early afternoon, then took a separate park shuttle from Laguna Amarga to Refugio Torres Central (another couple dollars a person). We had been worried about the park shuttle from L.A. to Central, but no problem at all — there was enough room on the bus and they seemed willing to send another bus if needed. Just make sure you ask someone when you arrive at the park about the shuttle schedule because there are only a few per day. It seemed the one we took was strategically timed to coincide with when tour buses arrived, but good to double check. A small note about Central: there’s both a hotel there and a refugio; make sure you pick the one you want because they are a bit of a walk apart. Central was the most built-up of the refugios we saw (and the busiest); there’s a nice little restaurant there if you’re hungry (as opposed to smaller refugios where they only serve meals at set times and you need to reserve them in advance). Most important for us, there was a luggage room to store our stuff overnight (for another couple dollars a person); we wanted to travel light as we ascended the last leg of the W toward the iconic Torres themselves (for which the park is named). We had arranged to stay at a much smaller refugio, the Chileno, halfway between Central and the Torres. We spent the afternoon trudging up the steep climb to Chileno. This was the least attractive scenery of the trip for us, mostly just a dusty hill with pasture behind us, and tiring because of the elevation gain (though the morning of Day 4 would made this leg a resounding success). Hiking the rightmost leg made us realize what a transitional area TdP is — like parts of the Rockies, it’s where grasslands to the east meet mountain peaks to the west. It also occurred to us that if hikers begin their W adventure on this leg, they might start a little grumpy — a lot of work for no immediate gain. It’s pretty windy, too, on some of the ridges, and the dust storms weren’t pleasant. Some of the gusts even made us stop walking for a few minutes. We were both glad we had sunglasses to keep dust out of our eyes. But as we came in sight of Refugio Chileno, the dusty hillside gave way to mountain forest — much more scenic, and as we looked up at the peaks ahead we grew excited for the next day.

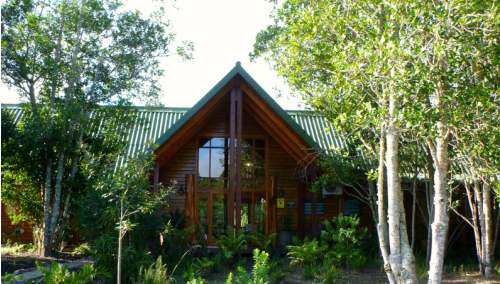
Chileno, like Paine Grande, is a perfectly nice hostel. Better food at Chileno (at least breakfast and lunch; Alison and I disagree on whether dinner was better), but less privacy — we slept in a room of nine. Fortunately. everyone was there to hike, not party, so we all agreed on lights-out at 9pm. Overall, for proximity to the Torres, glad we picked Chileno. For what it’s worth, we got the sense Chileno and Torres (run by the same company) felt a little more organized than Paine Grande (run by a different company), although we found Paine Grande had some great amenities. Hiking time to Chileno from Central: maybe 2-3 hours, straight uphill.
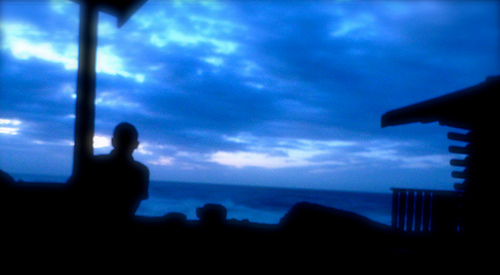
(e) Day 4 began very, very early. We had resolved to take a shot at seeing the Torres by first light, so we needed to leave a couple hours before the early summer sunrise. We were on the trail by maybe 2:50am. It turned out to be early enough to see the show, with a bit of time to spare (although we were glad we didn’t feel rushed hiking in the dark).
We then discovered we had made a serious strategic blunder: we’d packed only one headlight and no flashlights. A simple, common-sense note for Patagonia planners: if you’re even considering a night hike, bring as many lights as you have people. We managed the uneven trail, at times rocky, at times covered in roots, by having Alison walk behind with the light and me trying to stay ahead of her and to one side so we could both make use of what little light we had in the pitch blackness. Very glad we had no battery problems, and no accidents. By 4:30 or so it began to lighten, so the going got brighter though also steeper and rockier near the top. It was very cold up there — perhaps the coldest of the trip — but the show was sensational as the sky brightened and the Torres glowed.
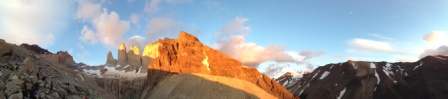
The brightest glow doesn’t occur right at sunrise, so make sure to stick around. It’s worth staying for 45-60 minutes to watch the changes. We heard it could be cloudy, so I gather not everyone gets to see it, but if you do, it’s incredible. Worth the gamble at 2:50am; how many chances will you get? Just bring enough lights and enough clothes. We returned down the mountain in time to catch the end of breakfast at Refugio Chileno. Total hiking time up and back: 2 hours up in the dark, maybe 60-90 minutes down in the light. Then we returned the rest of the way from Chileno to Refugio Torres Central (1.5-2 hours), collected our stuff at Central, had a beer (Cerveza Austral, quite good, try the local Calafate berry flavor for something different — yes, the berry is where the town El Calafate got its name), caught the park shuttle to Laguna Amarga, met our friend Juan from Day 3, and fell asleep before the bus had even left the park.
(12) Puerto Natales and Punta Arenas. Neither of these, we found, had the charm of El Calafate, and we didn’t stay in either long. The highlight in Natales was our B+B — we stayed at Pire Mapu, which is a bit far from the center of town but nice accommodations, sweet owners, and decently priced (I think maybe US $60, including breakfast). The bus to Arenas was uneventful and pretty cheap, though we were glad we bought tickets for this bus when we were in El Calafate (we bought them at the bus station through a ticketing agent, and he was the only one there who sold tickets for non-Argentina destinations). In Arenas, we found a cheesy museum of Chilean naval history that was actually kind of interesting, though overly focused on nautical details only true seafarers could appreciate. However, it did have a pretty long video shot by a crewman on a voyage around Cape Horn, which was fascinating. We would have definitely taken a boat to see the penguins on Isla Magdalena if we didn’t have plans to encounter penguins elsewhere on the trip. Otherwise, there didn’t seem to be too much to do in Arenas.
(13) Cruceros Australis. So, having made it all the way to South America on frequent flyer miles and having tried to keep to a middle-of-the-road budget for much of Patagonia, we decided to splurge on this 4-day cruise from Punta Arenas, Chile, to Ushuaia, Argentina.
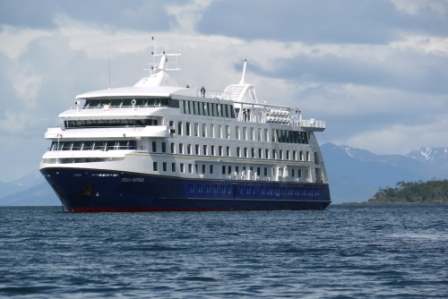
This was definitely a deviation from our planned “middle way” squarely into the realm of the posh. The itinerary boasted beautiful glacier views, all manner of wildlife, luxury accommodations, daily outings from the boat to hike on otherwise inaccessible islands, and a chance to reach legendary Cape Horn, the southernmost point in the Americas. There’s much to be said for the cruise — the food was fabulous, the cabins immaculate, the wildlife fascinating (penguins, cormorants, dolphins, sea lions), the glaciers grand, and the Cape Horn trip memorable (if rocky as hell). But it just couldn’t stack up to TdP or Perito Moreno for beauty. It was a fun four days (well, except for the ride to and from Cape Horn, which was nauseatingly lurchy), but for the price, it didn’t give us enough on top of what we’d already seen. Now, if you have more money and less mobility or desire to hike, then it’s a totally different story — this is a great way to see the glacial landscape and the wildlife while eating well and going to some of the most remote areas of this fairly remote part of the world.

(14) Ushuaia. This town’s claim to fame is as the southernmost city in the world. That and its status as the capital of Tierra del Fuego (“Land of Fire”) make it sound plenty alluring. It isn’t. Glacier Martial, in walking distance north of the town, had a decent view of the Beagle Channel, but it didn’t compare to Patagonia for beauty or hiking. Ushuaia is an OK town — I was a big fan of the fish restaurant we found near the pier, Tia Elvira (Alison less so) — but overall, nothing special. When I asked a friend who had recently toured Patagonia and Tierra del Fuego what he would recommend in Ushuaia, he asked why were going there at all if we were seeing Torres del Paine. He was right.
(15) Final thoughts, and variants on our itinerary. It should come through pretty clearly from what we’ve written that we thought the best sights and most bang for the buck were, unquestionably, Torres del Paine and Perito Moreno Glacier in El Calafate. The cruise was neat but probably not worth the expense, particularly in light of TdP and Perito Moreno (though if you’re into nice accommodations, great food, and less hiking, the cruise is a good way to see glaciers and wildlife in luxury). Ushuaia was fine, but not worthwhile unless you’re there for some other reason, such as the cruise. For serious hikers, it sounds like El Chalten would be worth looking into, although one question we’d have is how different the scenery would be from Calafate and TdP. If you like our style of travel but are on a tighter budget, obviously Ushuaia and the cruise are the first things to cut. I suppose you could simplify your travels and cut some large expenses by sticking to the Chilean side entirely, but missing Perito Moreno would be a shame, in our view, since you’ve already come so far. If we had it to do again for our own trip, we probably would have tacked on Isla Magdalena near Punta Arenas to see some penguins, cut out the cruise and Ushuaia, and flown from Punta Arenas to Santiago or elsewhere in Chile, before finishing (as we did in our actual trip) in Buenos Aires. But the cruise was nonetheless fun and interesting (and how else do we get to the southernmost point in the world outside of Antartica?), and it’s hard to have regrets when we saw so much and had such a good time.